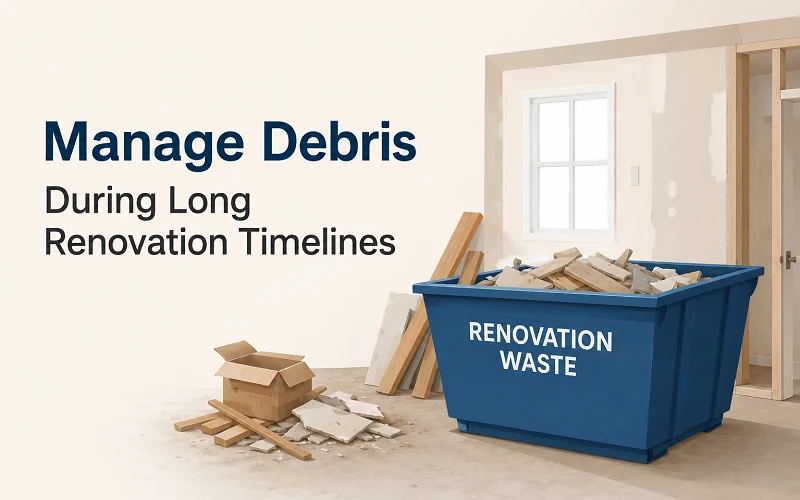
Long renovation timelines can be exciting, but they also create one of the most frustrating parts of home improvement: ongoing debris. A short project may produce a few days of mess, but a renovation that stretches across several weeks or months can fill garages, spare rooms, driveways, and work areas with packaging, old materials, broken fixtures, and construction waste. If homeowners do not plan for debris early, cleanup can become a constant source of stress.
Managing renovation debris is about more than keeping the property neat. A better plan can protect usable living areas, reduce repeated handling, make contractor work easier, and help the home remain more livable while improvements are underway. Whether the project involves one room or several phases, homeowners benefit from treating waste removal as part of the renovation schedule rather than something to handle at the end.
Why Long Renovations Create Ongoing Debris
Long renovation timelines often involve multiple stages. A homeowner may start with demolition, move into framing or rough-in work, wait for inspections, receive deliveries, install new materials, and finish with trim, paint, flooring, or fixture updates. Each stage creates its own type of debris.
Early phases may produce drywall, old flooring, cabinets, tile, lumber, insulation, fixtures, and broken materials. Later phases may create cardboard, plastic wrap, pallets, cutoffs, packaging, and small scraps from new products. Even if each stage seems manageable on its own, the debris can build up when the project continues for weeks.
Planning for those waves of waste helps prevent clutter from taking over the property.
Start With a Renovation Cleanup Plan
Before work begins, homeowners should think through where debris will go, how often cleanup will happen, and which parts of the home must remain usable. This is especially important when the family will continue living in the house during the renovation.
A simple cleanup plan should include a main disposal area, protected walking paths, temporary storage areas for new materials, and clear rules about what should not be placed in normal trash. Homeowners should also ask contractors how much waste each phase is likely to create.
Working with providers such as Waste Removal USA can help homeowners coordinate dumpster rental options for longer renovation projects. Having the right disposal plan in place before demolition begins can make the entire timeline easier to manage.
Match Waste Removal to Project Phases
Not every part of a renovation produces the same amount of debris. Demolition often creates the largest volume right away, while installation creates smaller but steady amounts over time. Homeowners should match their waste removal plan to these phases instead of assuming one cleanup day at the end will be enough.
For example, a kitchen renovation may need disposal during cabinet removal, flooring tear-out, countertop replacement, and packaging cleanup. A bathroom remodel may create a burst of debris during tile, tub, vanity, or wall removal, then more waste when new fixtures and materials arrive.
By thinking in phases, homeowners can avoid letting old debris compete with new materials for space.
Keep Living Areas Separate from Work Areas
One of the hardest parts of a long renovation is living around the mess. When debris spreads beyond the project area, the entire house can feel unsettled. Homeowners should create a clear boundary between work zones and daily living spaces.
Plastic barriers, closed doors, temporary floor protection, and designated debris routes can all help. Materials should not be carried through several rooms unless there is no better option. If debris must move through finished areas, those paths should be protected and cleared regularly.
Keeping the work zone contained helps the home feel more manageable, even when the renovation itself is still unfinished.
Create a Designated Disposal Zone
A long renovation becomes much easier when debris has a consistent destination. Without a designated disposal zone, old materials may pile up in corners, near doors, in the garage, or along the side of the house. These piles can block access and make the project feel disorganized.
A dumpster or other planned disposal point gives homeowners and contractors a clear place to put approved waste. The location should be convenient enough for loading but should not block parking, deliveries, sidewalks, garage access, or areas the family needs to use.
A consistent disposal zone also helps everyone involved in the project understand where cleanup belongs.
Plan for Specific Renovation Types
Different renovation projects create different debris challenges. Flooring work may involve carpet, padding, tile, wood, adhesive, and trim. Kitchen renovations may include cabinets, countertops, appliances, packaging, and plumbing fixtures. Bathroom projects can produce tile, drywall, tubs, shower surrounds, vanities, toilets, and flooring.
A tub to shower conversion is a good example of a project where debris planning matters. Removing the old tub, wall surround, tile, plumbing access materials, packaging, and new shower installation waste can create more material than many homeowners expect.
Thinking about the specific project type helps homeowners prepare for the actual waste involved instead of relying on a general cleanup plan.
Watch for Packaging from New Materials
Homeowners often focus on demolition debris, but new materials can create plenty of waste too. Cabinets, fixtures, flooring, lighting, vanities, doors, trim, tile, and appliances usually arrive with cardboard, plastic wrap, foam, straps, pallets, and protective packaging.
If packaging is not removed regularly, it can crowd the home just as installation begins. Contractors may need space to work, measure, cut, and stage materials. Homeowners may also need walkways and storage areas to remain usable.
Breaking down boxes and removing packaging as materials are opened keeps the project from feeling more cluttered than necessary.
Avoid Moving Debris More Than Once
Repeated handling is one of the biggest time-wasters during a long renovation. Debris might be moved from a room to a hallway, from the hallway to the garage, and from the garage to a truck or dumpster. Each extra step adds labor and increases the chance of damage or mess.
A better plan moves debris as directly as possible from the work area to its final disposal point. Homeowners should think through the path before work begins and keep it clear. If the route becomes blocked by tools, boxes, or furniture, cleanup becomes harder.
Direct debris movement helps the project stay cleaner and reduces unnecessary work.
Keep Driveways and Walkways Usable
Driveways, walkways, porches, and side yards often become temporary staging areas during renovations. They may hold materials, tools, dumpsters, contractor vehicles, or debris waiting for removal. If too many things collect in these spaces, daily access becomes frustrating.
Homeowners should decide which areas must remain open. The family may need a parking space, a path to the front door, access to the garage, or room for deliveries. Contractors may need space for equipment and materials.
Good debris management protects these access points instead of allowing renovation clutter to spread everywhere.
Schedule Regular Cleanup Checkpoints
Long renovations benefit from cleanup checkpoints. Instead of waiting until the mess becomes overwhelming, homeowners can schedule small cleanup reviews at the end of each major phase. These checkpoints help identify what needs to be removed, what can be recycled, what should be saved, and what is blocking the next stage.
For multi-week projects, a weekly cleanup review can be helpful. Homeowners can walk the site with the contractor, check debris areas, confirm what materials still need to be kept, and decide whether disposal capacity is still enough.
Regular checkpoints keep cleanup from becoming a major project of its own.
Know What Should Not Go in the Dumpster
Some materials should not be placed in a standard renovation dumpster. Paint, chemicals, batteries, certain electronics, tires, hazardous materials, and some appliances may require separate handling depending on local rules and rental guidelines.
Homeowners should create a separate area for questionable items until they know how those materials should be handled. This prevents restricted items from being mixed with general construction debris. It also keeps the main cleanup process moving without creating problems later.
When in doubt, homeowners should ask before loading.
Communicate With Contractors About Cleanup
Contractors and homeowners should discuss cleanup expectations before work begins. Some homeowners assume cleanup is included at every stage, while some contractors focus on removing their own trade debris only. Clear communication prevents frustration.
Homeowners should ask where debris will be staged, who will load the dumpster, how often cleanup will happen, and what areas need protection. If several trades are involved, everyone should understand the disposal plan.
Clear expectations keep the renovation cleaner and reduce misunderstandings during a long project.
Adjust the Plan as the Renovation Changes
Long renovations often change along the way. Hidden damage, delayed materials, design updates, or added work can increase the amount of debris. A project that started as a single-room renovation may grow into flooring replacement, wall repairs, plumbing changes, or exterior work.
Homeowners should revisit the cleanup plan whenever the project scope changes. If more demolition is added, disposal capacity may need to increase. If the timeline stretches, the dumpster schedule may need to be adjusted.
A flexible plan helps homeowners stay in control even when the renovation does not follow the original schedule.
Managing debris during a long renovation timeline requires planning, communication, and regular cleanup. When homeowners wait until the end of the project, debris can spread into living areas, block access, slow contractors, and make the home feel chaotic. When waste removal is handled in phases, the renovation becomes easier to live with.
By creating a disposal zone, protecting living spaces, planning for demolition and packaging waste, scheduling cleanup checkpoints, and adjusting as the project changes, homeowners can keep the property more organized throughout the renovation. A strong debris plan helps the home remain functional while the improvements are underway and makes the final cleanup much easier when the project is complete.